Monday, July 26, 2010

A tribute to Gene Field

Some years ago I restored a 63 Ford Galaxie. I had no prior experience but I did have a great mentor in Gene Field. Gene spent his entire adult life (and we are talking some 83 years here) in the business of restoring old cars, or as he would say with a smile, helping old junk down the road. Before that he was as an 18 year old fighting in Europe during WWII.
One of the many, many things that Gene taught me was that you can't hurry body work. You fill and you sand and you fill and you sand and so on. When you think it is perfect then you align it with the sunlight, pour water over it, look for the imperfections and mark them with a sharpie.

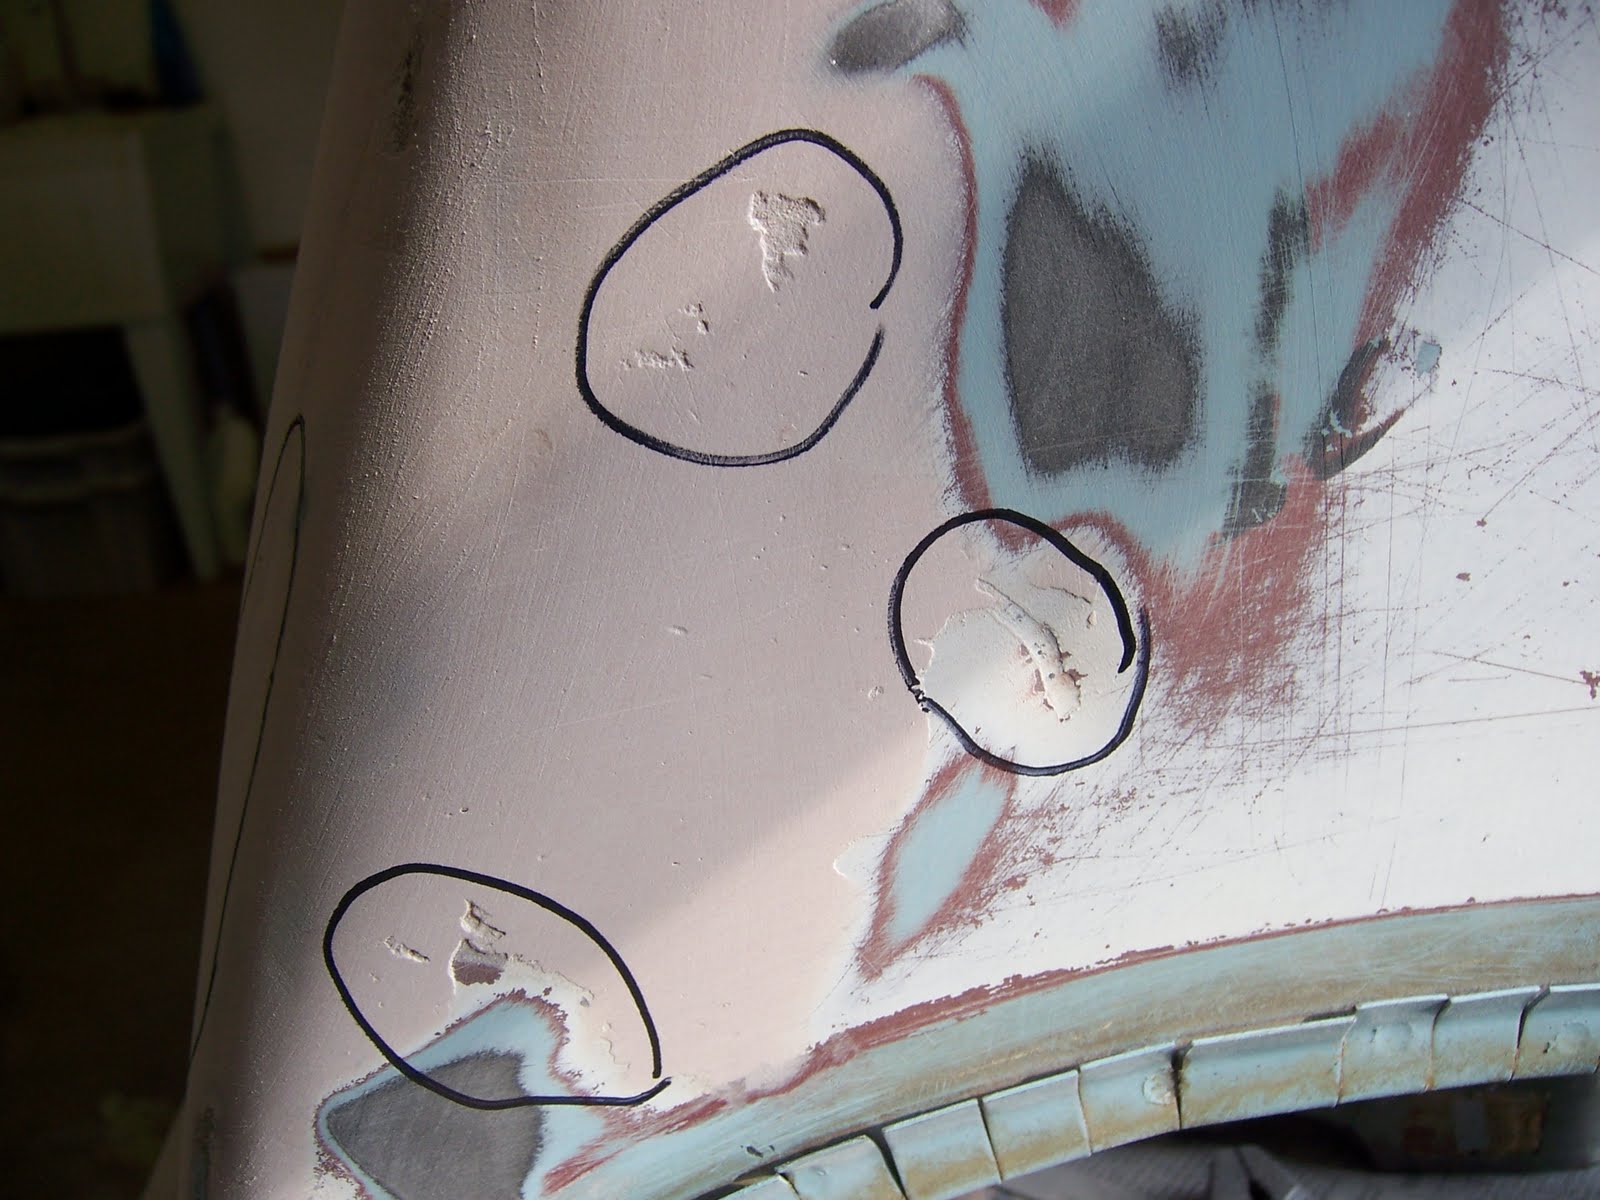
Then you fill and sand and fill and sand. The front of the cart has over the years taken a beating but I am, in the best Gene tradition, going to help this piece of junk down the road, Mr Field would have it no other way.

My old friend and mentor isn't doing too good these days and I don't think that he will be restoring any more pieces of junk but I know he will get a grin out of this old golf cart. Thanks for your help old man.

Thursday, July 22, 2010

The wheels are on, and off and on and .......

The plan was to leave the cart alone for a while and do some yard work but when I got home I found the wheels had arrived and, well you know how it is. I guess that the front wheels had not been removed for decades as the nuts were cold welded on, in fact they were so tight that the cart moved as I tried to spin them off. Still all's well that ends and I finally got to this stage.

Now I am looking at the cart thinking that something is not quite right but I can't put my finger on it. Then I pushed the cart back and it wouldn't move. One of the front wheel was locked up. I

looked closer and discovered the wheel was fouling on the track rod end WTF! How can this be? (If you want to play detective click the image above and see if you can spot the issue). Then I notice that it was in fact the valve hitting the steering and brilliantly deduced that I had put the wheel on inside out. Mistake number 1.

So with the wheels on I stepped back to bask in my overt manliness and to my chagrin I saw that the tread patterns were slightly different. Then I noticed that there were directional arrows on the tires. Can you guess how many wheels were on backwards? Tout alors et merde as we say in German. Mistake number two.

So now I am at this stage and I think we can all agree that it looks quite magnificent, yes? So I decide to offer the front end up and discover that the body has different clearances to the chassis and there is no way on God's earth that it is going to fit around these fat boy tires. Mistake number three.
As it happens this is not the end of the world. A 4 inch lift kit will make my problems go away and I was toying with the idea anyway so this is just a nudge in the right direction. Still all in all I should have stuck to the yard work.

Wednesday, July 21, 2010

Onwards

I have noticed that if you go to the newer flashier auto part stores you are inevitably served by kids who know squat. However if you go to the old school stores you meet folks who know about car parts. Case in point I went into my local NAPA and told them that I needed to improvise some rubber muffler mounts for the cart. They guy went off to the rack and came back with a selection of rubber parts that were largely meaningless to me but we worked out that cutting this thing in half and shaving the sides would work and now the muffler is on. Just in time really as I spent 15 minutes tuning the engine without the muffler and I seriously hurt myself. My ears were ringing for 24 hours and I still have an earache. Just goes to prove that you are never to old to be a dick.

P.S. just as a bolster for my ego the original did not have rubber mounts and the muffler was bolted meal to metal. However on half is bolted to the frame and the other to the engine, which vibrates. Hopefully my design will cut down on vibration through the frame.

Tuesday, July 20, 2010

Cleaning the muffler

The regular reader (all one of you ) will recall the saga of my cleaning the engine by putting it in the dishwasher on a heavy wash cycle. Well like most of my bright ideas it didn't really pay off, although it did leave a nasty oily residue in the bottom of the dishwasher which lingered for weeks.

I now need to clean the muffler. It turns out that because the engine burns oil and gas the muffler gets choked with a gunky residue and this has been know to solidify, block the muffler and of course stop the engine. Apparently the solution is to barbecue the muffler. Yes indeed you put it on the barbie and get it up to 500 degrees. This supposedly burns out all the crap and you are good to go. Now my BBQ is up on the mountain but I think I have a better solution. As I understand it, an electric oven on the self clean thingy gets up to 800 degrees so I could just bung it in and clean the oven. Of course I need to smuggle this past the old girl and therein lies the fly in the ointment.

I have no idea how the oven works. BUGGER!

Monday, July 19, 2010

New wheels

Today I realised that I was going to spend some serious cash. I scoured the four corners of the Internet and found these bad boys. They are exactly what I wanted. Big chunky tires with the added bonus of being premounted onto 8 inch rims. This will increase the overall diameter from 18 inches to 22 inches and should just about fill the wheel arches. I think that we can all agree here that size is important.
I also bought the two clutches today. I managed to find OEM parts at a good price and what is more they actually took the trouble to call me and let me know that a) they had my order and b) I should expect it all of Friday. It turns out that of all the places in the US they are 20 miles from my home.
Of course with all the money I saved I bought a new carburetter so I didn't save anything at all, but I'm still stoked about the cart.

On a practical note I now suspect that the final cost will be closer to $2000 that the planned $1500 (isn't that always the way?) On the face of it I could have just spent $2000 on a cart but at least I will be driving a cart with a new engine, a new set of clutches, a new set of wheels and tires and a new paint job. In addition what value can I put on the fun it all is to pull a piece of crap out of the woods and turn it into a fun machine.

If you think that I am just trying to justify my crazy logic, you are right.

Friday, July 16, 2010

It's Alive!

When I started this project I tried to work out the finals costs, of course I was way out. Case in point, last night I needed to buy the belt between the starter and the engine. Now this is just like a regular fan belt and yet for some reason it cost $20. (I know bitch, whine, moan).

Anyway I fitted the belt, fitted the throttle cable, fitted the choke cable, squirted a shot of gas into the air intake and........

Now you would think that at this stage I would be doing a happy dance in the sun and I guess that I was because all of the electrical components that were hitherto untested actually worked as you can see. Sadly there must still be some crud in the carburetter as the best I could get was a fast idle. Still nothing that can't be fixed or maybe the better option will be investing $89 in a new carb.

For the moment I am content to bask in the glory of a little Robin 249 cc engine that fires up.

Wednesday, July 14, 2010

The engine is back in

After much heaving and moaning I got the engine back in. It actually lies on its side and there are 4 bolts on the bottom of the crankcase and three on the top. In rather a nice design feature the top bolts on each end rest in slots so you can drop the engine into the cradle and then get the remaining bolts in.

I got the starter / generator wired up and joy of joys the motor spins (in both directions). For reasons I don't understand the reverse warning now works. It hasn't up until now and I just assumed it was shot. It must be something to do with the starter finally being connected.
Tonight I will buy some gas and a starter belt. Then connect the new throttle cable and the choke and see if she starts.

Friday, July 9, 2010

Another step closer

Sometime in the past the starter / generator bracket broke and the douchbag that was driving the cart "repaired" it by jamming a block of wood between the engine and the generator. (Lest you think that douchbag is too stern a description, this is the person who ran it without an air filter until the crankcase filled with dirt and it seized up whence it was dumped in the woods. Under the circumstances I think that we can agree his full name is Douchy McDouchbag from Douchville).

Anyway I scoured the four corners of the Internet and eventually found a kit that supposedly converts a Harley Davidson generator from spring loaded to adjustable, whatever that means. With a spot of drilling and twatting I got it all together and even if I do say so myself I am rather proud of my overt manliness
The strap is a touch too long but if the seat closes then I shall leave it alone. If not then I shall tickle it with the angle grinder.
Now it is Friday night and I can either write a long technical blog or do in a case of Heineken.

Wednesday, July 7, 2010

More stripdown

Lots more progress. I finally got all of the trim off and let me tell you that was no easy task. It needed to be done because a) some halfwit had sprayed the entire cart (including the rubber trim) white and b) the trim wraps around from back to front and had to be removed to get the front off. Incidentally under the trim you can see the original color, a rather fetching duck egg blue.

So with the trim off I was finally able to remove the front end and although it only took you seconds to read about it, it took me hours to achieve. Lucky you. With the front off I was able to sweep out 10 years of leaves and squirrel's nests, but I did find ......
...... some old wooden tees and a marking pencil. Now call me a gay bar loiterer if you will but I find a certain fascination in the realization that many, many years ago this piece of junk was actually a golf cart that was used to haul golfers (too lazy to walk) around a course. Not for the first time do I fantasise about having a time machine to see the living history of whatever. Ooopps, seem to have drifted off here.

I also made a start on the electrics. With the aid of copious quantities of WD40 I was able to free up the throttle and the lever from the throttle to the hill brake which now all works. Contrary to expectations the micro switch on the throttle was not welded in position and a small adjustment of the actuator got that running. I needed to remove the throttle cable and sadly sheared off the bolt that holds it to the rod so it looks like another huge expense with those avaricious vipers at EZ GO. Still I did manage to get a generic choke cable and ignition switch at my local auto parts store so that saved me some of my hard earned wedge.
I also removed the oil reservoir as I have decided to go the pre mix route, it just kind of worried me that there were too many things to go wrong with the oil pump system and if they do go wrong then the first symptom is my newly rebuilt engine seizes up.
Tonight I shall spray the engine bay with Rustoleum black and carry on with rewiring the ignition.


Thursday, July 1, 2010

Done

There it is (nearly) all finished. Last night I installed the ignition sensor, the flywheel, the fan and the cover. I bought a whole load of miscellanea last night and when I got home I found that the store clerk had not put the tin of engine black in the bag (not quite the disaster it might have been as he didn't even ring it up) so my plan to paint the air deflector didn't happen.

Also the bracket that allows you to adjust the tension on the starter belt is broken so I need to get that welded up. (Someone in the past had jammed a block of wood between the engine and the starter).

Missing forever was the gas cap so I found a nice replacement and as this is rather a short post here is a picture for your edification. Enjoy

With the engine out working on the engine bay will be a lot easier. It looks like in a fit of pique someone has ripped out some of the wiring so the next step will be to remove all of the ignition parts, clean out the bay and spray it all black. Then replace the wiring and the connectors and see if she will fire up. Once that is done I need to drop another (softly sobbing) $400 on new clutches. Then to beat and fill the body straight respray and I should have a new 1986 golf cart.