Wednesday, June 30, 2010

Onwards

This is how I started the evening, the first job being to remove the piston so that I could insert it into the cylinder
On the plus side, the ring compressor worked like a dream. On the negative side it is always a pain to have to buy a tool only to use it once, such is life.

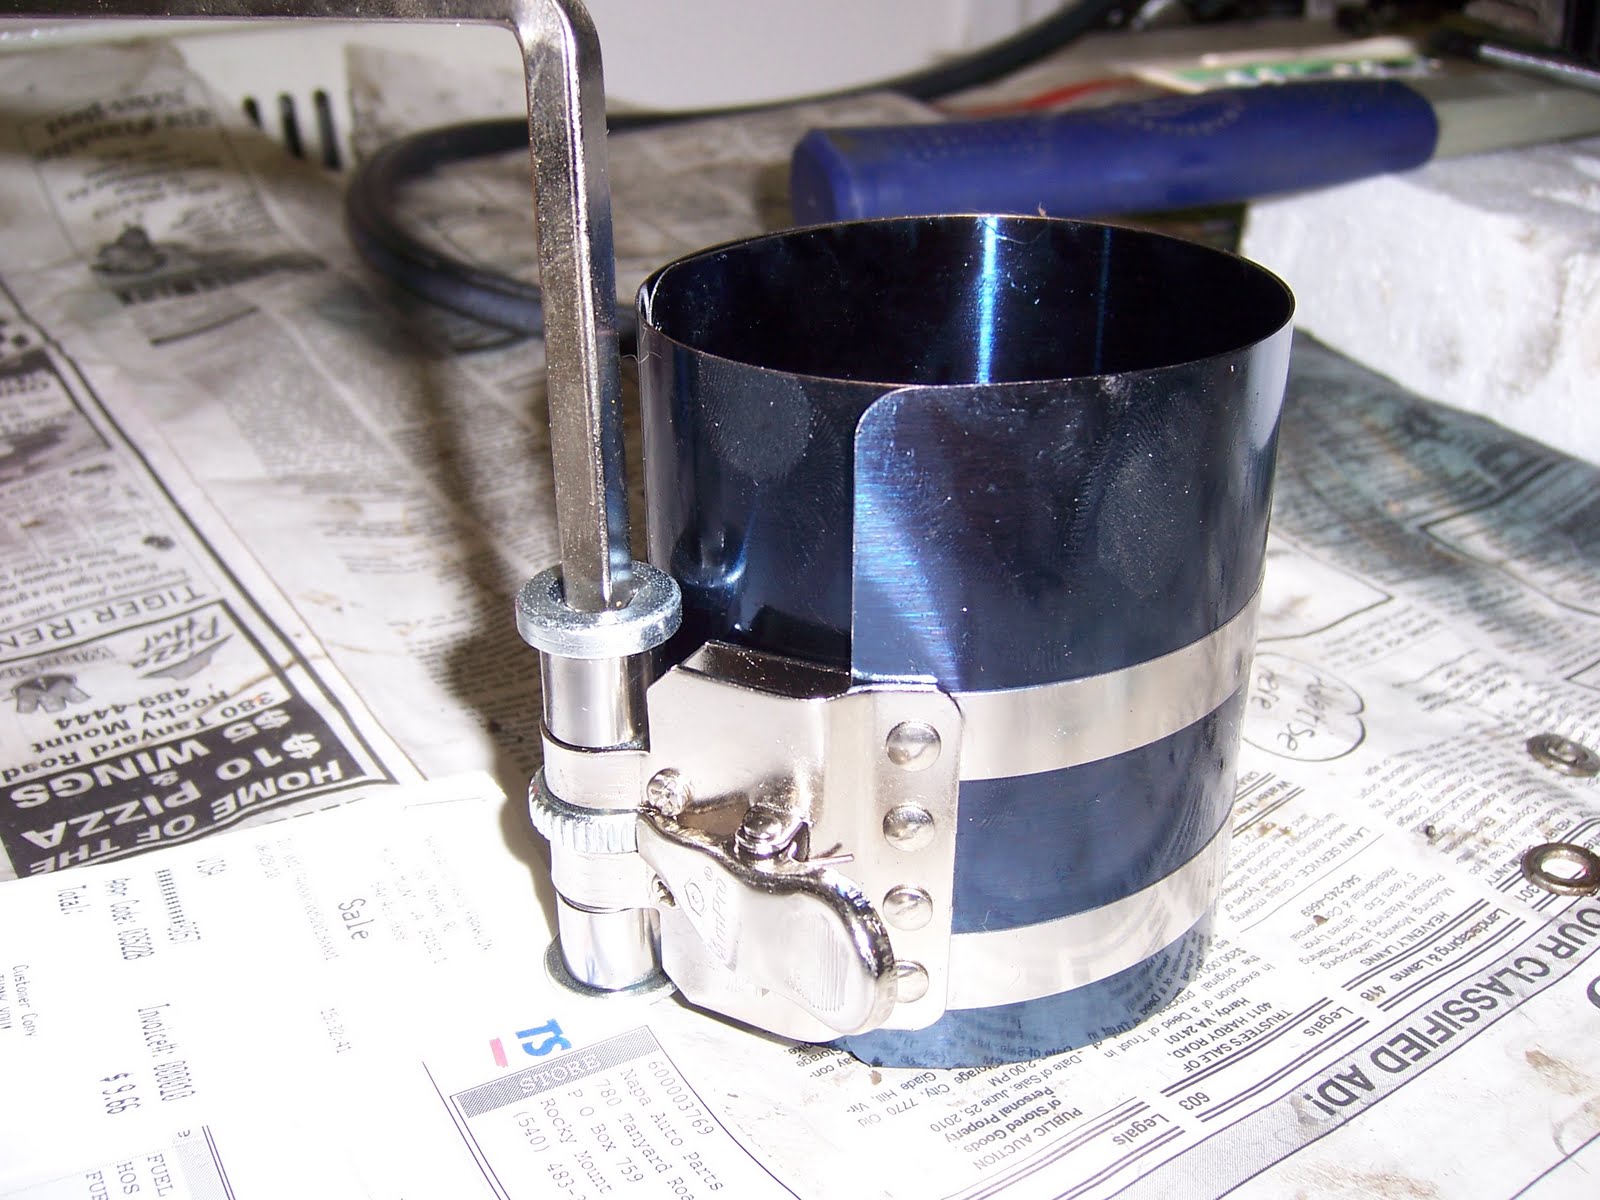
Without any drama at all (and let me assure you that is a novelty) I got to this stage, the piston is in the cylinder and the cylinder is sitting on the block. Doesn't that look sharp?
Now many years ago I discovered that I am not as smart as I think I am when it comes to remembering where the bits came from. So these days I use a ton of ziplock bags and with a sharpie I bag and label every little group of parts. I found the baggie that said cylinder crankcase nuts which also contained the old little end roller bearing and two spacers. A quick look at the engine schematic proved that these should have been fitted with the piston so it was off with the cylinder and once again off with the piston. Still on the bright side I got to use my ring compressor more than once.

And here we are the cylinder is bolted down and the head is on.

Finally I got the carburetter on as well as the fuel pump. Because I had reassembled the fuel pump incorrectly it would not fit in the space and was fouling on the starter bracket. It took about an hour to work out what had gone wrong. Still it only took you 10 seconds to read about my misery.

Tonight I shall install the ignition sensor, the flywheel, the fan and the fan shroud. That will complete the engine rebuild and then I will start to rewire the engine bay.

Monday, June 28, 2010

Getting it back together

The next hurdle was to get the journals onto the crankshaft. Once again it transpired that I knew a man who knew a man and JC came up trumps, so here is the completed item. Now and lest you wonder why are there two bearings on the right side? Well this is the side that houses the centrifugal clutch and thus is subject to the most stresses.

Of course getting the bearings into the crankcase halves was a pain as they are also an interference fit, still I was able to get them close with the help of a rubber mallet and then use the bolts to clamp the halves together.

I decided to mount the piston to the connection rod next and I was going to use the term gudgeon pin but I just knew that you colonials wouldn't understand so I looked it up and apparently you call it a wrist pin. Anyhoo the gudgeon pin is held in with two spring clips and it was patently obvious that if the clip pinged off the end of the needle nose pliers I would be in a world of misery. The first one snapped on beautifully so now being full of je ne sais quoi I decided that rather than turn the engine around I would do the second one left handed. Can you guess what happened? In a word "ping". Still once again I received confirmation that God is an Englishman as by some miracle I found the little bugger and this time using my dominant hand I got him on. (Many hours after I had cleaned up I realised that I should have inserted the piston into the cylinder before attaching it to the con rod so tonight it is coming off again, can you say ping?).

On a different subject I wanted to take the brushes off the starter motor / generator. There are 4 brushes, 2 for the generator and 2 for the starter. The first came out nicely but the screws on the other three were just rusted in. The good news is that there was plenty of meat on the one I got out so I settled for blowing some compressed air and lubricant in and replacing the brush.

Tonight I hope to get the carburetter, fuel pump, flywheel and cover back on. Watch this space.


Tuesday, June 22, 2010

The bits are here.

All my parts have arrived and this has spurred me on to greater efforts. As you know the engine was is in a filthy state and much scrubbing seemed to make little difference to the layers of grease, oil and dirt. The I hit inspiration, not a word to Mrs. P but as I type the two crankcase halves and the cylinder head are in the dishwasher on a heavy wash cycle.

I'll let you know how that works out.

Friday, June 18, 2010

Time to open the wallet


I haven't done too much with the engine lately. I did dismantle the fuel pump and clean it out of this real nasty brown gritty sludge, God knows what had happened here. Similarly I broke down the carburetter and again found it completely clogged with sludge. I did have a lucky moment when I used a can of compressed air to blow the fuel line out and inadvertently launched the cut off valve across the garage. By some miracle I found it and that saved the price of a new carb (and a lot of tears).


But the big news is I finally bit the bullet and ordered up the engine rebuild kit. Let the spending commence.


Wednesday, June 9, 2010

At freakin last

It really has been a miserable week or so, for various reasons. Still it ultimately ended in triumph and that coupled with the fact that if anyone could do it, it wouldn't be fun, is the main thing. Here is how it all went down.

In order to remove the centrifugal clutch you need a special tool to screw it out. You can either spend $49 or make it yourself for $10. I chose the cheap option which consists of a 3/8 rod and a 3/4 bolt. Sadly I bought a 9/16 bolt (why I ask myself) and this coupled with the fact that the instructions called for a 5 inch rod (titter) when I needed a 3 inch rod made it all a very miserable experience. Once I had all the correct parts I realized that I didn't have a 1 1/8 socket and so it was another trip to the hardware store. Finally we were set and then I discovered that I could not hold the block and twist the socket. So with me standing on the block and Susie bouncing off the socket handle, we finally spun the clutch off.

At the other end of the crankshaft is the harmonic balancer. Once again this needs a special tool but I made the job much harder by trying to use a regular puller. The whole thing was exceedingly tedious and it is more tedious to write about it, so let us just say that the balancer is also off. One of the main bearings had seized up and so getting the crankcase off was a bear until I hit it with a blowtorch and it literally fell off.


And there we are one rusty crankshaft. One the right you can see the main journals still welded on.

That is as far as the tear down goes. Now it is crunch time. Up until now I have spent a few dollars on tools. In the next few days I have to decide whether or not to continue. I am sure that both the clutches will need replacing and that will cost circa $500, the engine rebuild kit is $400, the body wrap is $350 and I am sure that there will be a veritable cornucopia of other miscellaneous expenses. Would I be better off just buying a used cart for $2000?

I am going off to the mountains for a couple of days to decide.

Tuesday, June 1, 2010

Getting closer

So I will skip the boring stuff and cut to the chase. I got all of the peripherals off and then pulled the head. Now all this time I had assumed that the piston had seized as I could not turn the crank, however once I pulled the cylinder bolts and squirted some penetration oil in the bore the cylinder slid off. Here is a picture of the piston and you can see that there is plenty of blow through indicating that the piston rings are shot. If you look carefully you can also see that the piston is in fact cracked. There was never a possibility of me not rebuilding the engine but it is good to see that I made the right call.

Below is the crankcase with the con rod sticking out of the top. The thing still won't turn so I am guessing that the main bearings have seized. Sadly this is where I came to another grinding halt. I need to remove the centrifugal clutch at one end and the flywheel at the other, both of which require special tools that I don't possess.


Once that is done I hope that I can split the crankcase and the tear down is complete. For now I am off to search for a friend with a puller.

Wired

I think that I am going to have to replace every single wire here.


I do love a challenge.